Friday, November 30, 2018

The Web Can’t Go Home Again

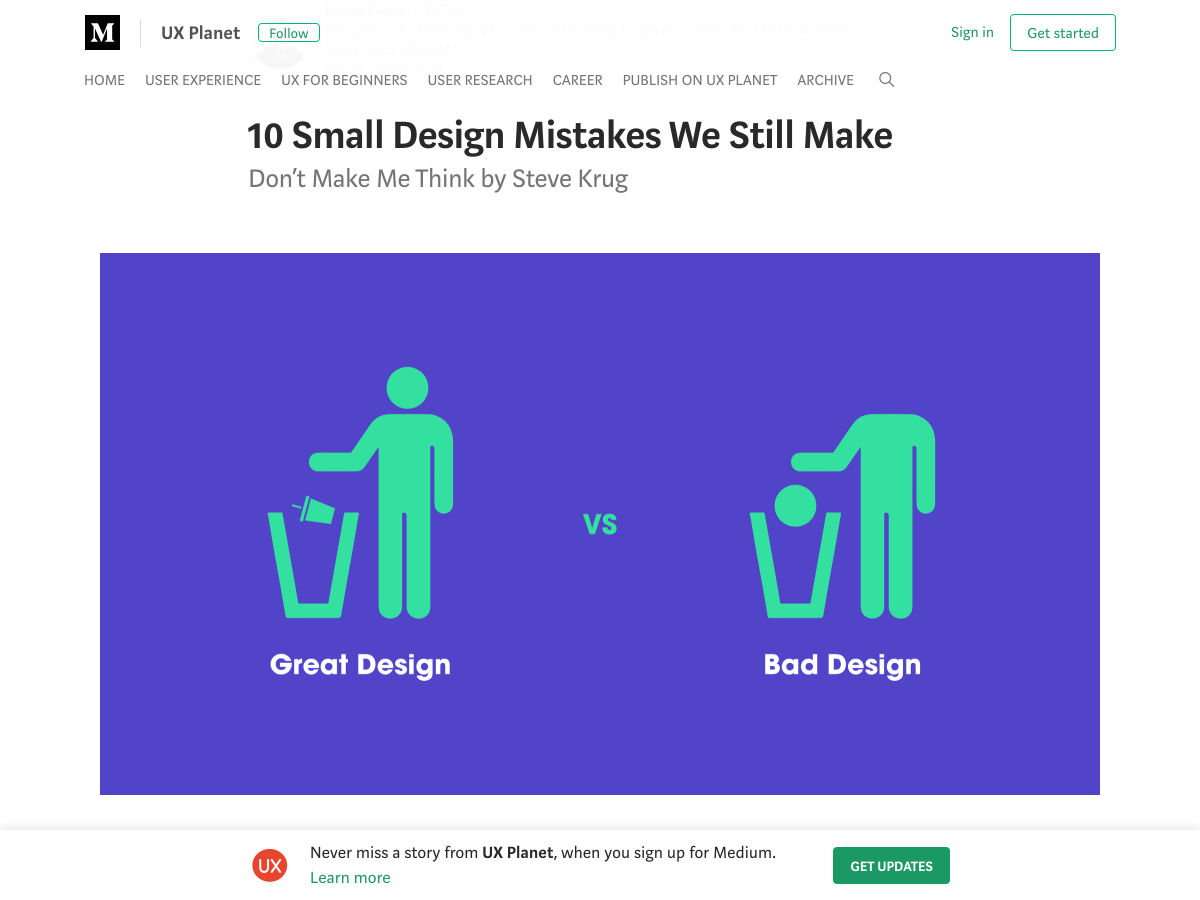
It’s far too easy to look back and imagine that everything was better then than it is now. God knows I miss being a skinny teenager, but I don’t want the acne back. The hormones can just shove right off, too.

Even so, there are things I miss about being younger, and frankly a bit naïve.

Lately, there has been conversation about the nature of the Internet, and many people seem to feel much as I do about my teenage years: that is to say, they miss the relative innocence. Though once reviled, dancing baby .GIFs and elements seem like high art compared to the click-bait, the passionate-yet-incomprehensible comment wars, and the desperate attempts of corporations to look “hip”. We’d be hard-pressed to look around and say, “Yes, this really is better.”

We even miss Tom, and his kind of desperate-feeling attempt to be everybody’s friend

We miss the utopianism of the early Internet pioneers. We miss the creativity of people just learning HTML, from the days of the first pages, to the days of the customized MySpace page. We even miss Tom, and his kind of desperate-feeling attempt to be everybody’s friend; because at least he was trying to be friends, not tell you how your every opinion was wrong.

And so here we are, in a new world of our own making, and we wish we’d made it differently. Some people blame corporations, and their focus on profit over community. Others more or less blame the blog format, and the press of people who all want to be a little bit famous. There are more than a few who blame social media.

None of these people are entirely wrong, of course. We could have done better. We can do better. We can make a friendlier Internet that promotes creativity. What we cannot do is go back.

“You can’t go home again.” For those unfamiliar, it’s an old saying based on the idea that once you leave a place, you can never truly return to what once was. Even if the place you left has stayed the same, you will have changed. The you that comes back is not the you that left.

We can do better. We can make a friendlier Internet that promotes creativity.

We can’t go back to the old Internet because we have changed. Like Adam and Eve in the proverbial garden, we now have knowledge of both the good the Internet can do, and the evil. Businesses have seen how much money can be made. The near-monopolies of the Internet have no reason to give up their advantages.

Elsewhere, communities have seen how, when there are not enough rules, or when the rules are not enforced, the loudest and most violent voices will oppress the rest. We have also seen that with too many rules, and inflexible enforcement, the bureaucrats will become the oppressors.

Knowing what we know now, we cannot go back to the wild west days of the Internet, because it’s unlikely that most of us could ever embrace that sort of potential without the fear born of our experience. Whatever the Web becomes next, I hope it has the better qualities of the Internet of the past, but it will not, perhaps cannot, be the same.

Okay, that’s quite enough mourning of our collective innocence. There are things we can reasonably do to help improve the state of the Internet, and after all that, I’d like to include a few I thought of.

Get Political

Now I don’t mean that you should tweet at your ideological opponents more, and I’m not going to tell you who to vote for. What I am going to say is that most politicians in most governments are sorely ignorant what what the Internet truly is, and how it works. Watching Mark Zuckerberg getting questioned was one of the more painful things a nerd could ever watch. Don’t even get me started on the mess that was/is the EU’s attempt to redefine copyright law. Articles 11 and 13 are nightmarish concepts.

Watching Mark Zuckerberg getting questioned was one of the more painful things a nerd could ever watch

If we’re going to bring back some of the fun to the Internet, we need to make sure our politicians are better educated about it. I’m not an expert on political activism; but perhaps we could all stand to reach out to our local politicians more, and not just when they’re about to take away half of our online rights through ignorance.

Make Alternatives More Attractive

For example: many video creators are feeling stifled under YouTube’s arcane and sometimes arbitrary sets of rules, and many a creator has lost their source of revenue overnight. You see, YouTube has become so massive that many video creators wouldn’t even think of putting their content elsewhere, which makes the platform even bigger. That centralization gives YouTube massive power over millions of creators, and their algorithms more or less define what many would-be artists create.

So on top of controlling smaller creators’ revenue, one website is having an out-sized impact on entire cultures. That is antithetical to the spirit of the Internet as it was intended to be. Some smart cookies have decided to try to alleviate this problem, and other crises caused by corporate near-monopolies, by creating decentralized versions of YouTube, decentralized social networks, and even decentralized versions of the Internet itself.

Alternatives to massive sites need more tangible, immediate benefits

These alternatives face one major problem (besides plain old logistics): attracting a user base in the first place. This is normal for any business breaking into a crowded market, but many of these projects advertise themselves by saying things like, “We’re not corporate and evil like Google.” The problem is that this is not something the average user cares about. We already give away our information freely, so privacy isn’t going to sell it either. Alternatives to massive sites need more tangible, immediate benefits.

Support Efforts That Lower the Web’s Creative Entry Requirements

We, as people who love the Internet, need to each make our own efforts to improve it. But we should also remember that there are plenty of people out there already doing what they can, and they need some love.

One of my favorite examples is that of NeoCities, which we’ve previously discussed here on WDD. Basically, it’s a place where anyone can create a basic HTML/CSS site about anything they like, for free, in the spirit of the old GeoCities sites. The idea is to encourage more people to try making sites for themselves with the lowest possible barrier to entry.

Projects like these need ongoing support, and frankly deserve free advertising. So that’s why NeoCities is getting a link.

Be Kind, and Forgive

If the Web is going to change (again), people will have to change (again). And as people change, we’ll need to be ready to forgive. We’ve all made mistakes in the past, from simply saying rude things online, to building tools that might have had a part in making the Internet a less friendly place. What’s worse is that the Internet has a better memory than we do.

as people change, we’ll need to be ready to forgive

If we’re going to make massive, sweeping changes to make the Internet more fun, and weird, and friendly, we need to be fun, weird, and friendly. More importantly, we’ll need to be kinder. We may find ourselves needing to be kind even to those who took part in making the Internet the unfriendly place it is now. People can and do grow and change, and if we’re going to make a better world, we can’t hold their past mistakes against them (so long as those mistakes are truly in the past).

Ultimately, the people on the Internet are the Internet, and we can’t go home again. We can build a new home, though.


Featured image via DepositPhotos.

Add Realistic Chalk and Sketch Lettering Effects with Sketch’it – only $5!

Source

p img {display:inline-block; margin-right:10px;}
.alignleft {float:left;}
p.showcase {clear:both;}
body#browserfriendly p, body#podcast p, div#emailbody p{margin:0;}

from Webdesigner Depot https://ift.tt/2U0j82g


from WordPress https://ift.tt/2BKt20R

Wednesday, November 28, 2018

Getting Started With DOMmy.Js

DOMmy.js is a super-lightweight, standalone Javascript library, designed to work easily with the DOM and produce powerful CSS3 animations via JS.

Full disclosure: I developed DOMmy.js. And in this tutorial I want to demonstrate how it can be used to keep your webpages nice and light.

DOMmy.js has a very shallow learning curve; it’s even shallower if you have ever used an old-generation style framework such as jQuery or Prototype.

DOMmy.js isn’t a next-generation framework like Vue.js, React, or Angular; these are tools which use new technologies such as the virtual DOM, dynamic templating, and data binding; you use next-generation tools to build asyncronous applications.

DOMmy.js is a Javascript frame work for writing “classic” Javascript code, working with the DOM at the core level. A Javascript framework like jQuery does a similar task, with three big differences:

  • jQuery uses a proprietary, internal engine to work with selectors and to produce animations. This engine is entirely Javascript-based. Conversely, DOMmy.js allows you to select any element in the DOM and create powerful animations, by using the modern and super-powerful specifics of both Javascript and CSS3. I didn’t need to write a Javascript engine to work with DOM and animations. The cross-browser, flexible and powerful tools that allow you to do it are already available. I just wanted a Javascript structure that would assists developers in writing DOM controls and CSS3 animations using the Javascript language.
  • DOMmy.js is a Javascript structure that looks at the future. It is written to be compatible with some of the latest versions of the major browsers, but I don’t want my code to be compatible with very old software like IE6/7 and similar.
  • jQuery and Prototype both have complete APIs based on an internal engine, DOMmy.js provides controls for just two main things: DOM operations and animations; other tasks can easily be accomplished with vanilla Javascript or by extending the DOMmy.js central structure.

So, DOMmy.js is a cross-browser, super-lightweight (the minified version weights only 4kb), super-easy to learn, super-fast to execute, Javascript library. In a nutshell, with DOMmy.js you can:

  • navigate throughout the DOM, by selecting and working with HTML elements and collections of elements;
  • create powerful CSS3 animations and collections of animations;
  • add (multiple) events, CSS properties and attributes to elements;
  • use an element storage to store and retrieve specific content;
  • work with a coherent this structure;
  • have a cross-browser DOMReady fashion, with which you do not need to wait for resources (like images and videos) to completely load in order to work with DOM.

Installing DOMmy.js

Implementing DOMmy.js into your web page is simple. You only need to include the script through the script tag, and you’ll be ready to start. You can download the script and use it locally or load it through the project’s website:

https://www.riccardodegni.com/projects/dommy/dommy-min.js

    // use dommy.js
    $$$(function() {
        // ...
    });

The DOM is Ready!

Like I said on before, with DOMmy.js we don’t need to wait for the resources of the page to load in order to work with DOM. To do this, we use the $$$ function. The content placed inside this handy function will be executed when the DOM structure (and not the “page”) is ready. Writing code with DOMmy.js is super-fast. I wanted to create a snippet that allowed me to write as less code as possible, so I guess that nothing is faster than writing:

$$$(function() {
        // when DOM is ready do this
});

…in a standalone fashion. Of course, you can use as many DOMReady blocks as you want or need:

// block 1 
$$$(function() {
        // when DOM is ready do this
});

// block 2
$$$(function() {
        // when DOM is ready do this
});

// block 3
$$$(function() {
        // when DOM is ready do this
});

Select DOM Elements

So now we can start to work with our DOM structure. You can select the element you want by using an HTML “id”. This is done with the $ function:

// select an element by ID. 
// In this case you select the element with ID "myElement"
$('myElement');

And you can select the collection/list of elements you want by using a CSS selector. This is done with the $$ function:

// select a collection of elements by CSS selector
$$('#myid div.myclass p')

Of course you can select multiple elements by using multiple selectors, too:

// a selection of HTML elements
$$('#myfirstelement, #mysecondelement')

// another selection of HTML elements
$$('#myfirstelement div.myclass a, #mysecondelement span')

There are no limits to DOM selection. The elements will be included in the final collection with which you can work with the DOMmy.js methods.

Adding Events

Adding events to elements (in a cross-browser fashion) is very simple. Just use to the on method on the collection of element you want to attach the event(s) to with the specific event:

// add an event to an element that fires when you click the element
$('myElement').on('click', function() {
    log('Hey! You clicked on me!');
});

Note: the function log is a built-in function that works as a global-cross-browser shortcut for console.log. If the browser does not support the console object the result will be printed in a global alert box.

You can add multiple events at once, of course:

// add a events to an element
$$('#myElement p').on({
    // CLICK event
    'click': function() {
        log('Hey, you clicked here!');
    },
    
    // MOUSEOUT event
    'mouseout': function() {
        log('Hey you mouseovered here!');
    }
});

As you can see, you don’t need to apply the DOMmy.js methods to each element. You apply the methods directly to the result of the DOM selection and the internal engine will properly iterate through the HTML elements.

You can access the “current” element in the iteration simpy by using the this keyword:

 $('demo').on({
     'click': function() {
          this.css({'width': '300px'})
              .html('Done!');
     } 
 });

Working With Attributes

In the same way, you can add, edit and retrieve the values of HTML attributes:

// get an attribute
var title = $('myElement').attr('title');

// set an attribute
$('myElement').attr('title', 'my title');

// set multiple attributes
$('myElement').attr({'title': 'my title', 'alt': 'alternate text'});

The attr method works in three different ways:

  • it returns the value of the specified attribute if the argument you provided is a string;
  • it sets an HTML attribute to a new value if you pass two arguments;
  • it sets a collection of HTML attributes if you pass an object of key/value pairs representing the element’s attributes.

Setting CSS Styles

Just like HTML attributes, you can set and get CSS values by means of the css method:

// set single CSS
$('myElement').css('display', 'block');

// set multiple CSS
$('myElement').css({'display': 'block', 'color': 'white'});

// get single CSS
$('myElement').css('display');

// get multiple CSS
$('myElement').css(['display', 'color']);

As you can see, with the powerful css method you can:

  • set a single CSS property to a new value, if you pass two strings;
  • get the value of a CSS property, if you pass one string;
  • set multiple CSS properties, if you pass an object of key/value pairs;
  • get an array of values, if you pass an array of strings representing CSS properties.

Getting and Setting HTML Content

With the html method you can set and get the element’s HTML value:

// set html
$('myElement').html('new content');

// get html
var content = $('myElement').html();

// logs 'new content'
log ( content );
    

Iteration

If you select more than one element, you can apply a DOMmy.js method to every element just in one call.
However, when you want to work with each element manually, like when you are getting contents (i.e. HTML content or stored content). In this case, you can use the handy forEach function in the following way:

// get all divs
var myels = $$('div');

// set a stored content
myels.set('val', 10); 

// ITERATE through each single div and print its attributes
myels.forEach(function(el, i) {
    log(el.attr('id') + el.get('val') + ' \n');
});

The forEach funtion is the preferred way to iterate through HTML collections of elements using DOMmy.js. When applied on a DOMmy.js element, it uses two parameters:

  • element: the DOMmy.js element you are selecting. You can apply every DOMmy.js method to it;
  • index: an index representing the position of the element in the collections of elements.

Storage

The storage is a place, that belongs to elements, where you can store as many values as you want and retrieve them at the desired moment. You can work with the storage by using the set and get methods:

// set storage
var myVal = "hello";
$('myElement').set('myVal', myVal);

// multiple storage
var mySecondVal = "everybody";
$('myElement').set({'myVal': myVal, 'mySecondVal': mySecondVal});

// get   
$('myElement').get('myVal') + $('myel').get('mySecondVal');  
// "hello everybody"

As you can see, you can store single item or multple items at once. The items you store belong to the element that you are selecting.
Note: remember that if you are selecting multiple elements, the item will be stored in each of these elements, even if the CSS is slightly different, because DOMmy.js recognizes each specific element:

// set an item to div#a and div#b
$$('div#a, div#b').set('myStoredValue', 10);

// get from #a, that of course is the same as div#a
$('a').get('myStoredValue'); // 10

Of course DOMmy.js internal mechanics identify “div#a” and “a” / “#a” as the same pointer to the same element, so you can safely work with storage and others DOMmy.js methods in a coherent way.

If you store the DOM element in a single variable, which is the best way to work with HTML elements, you can bypass concurrent calls and earn memory space:

const myEl = $("div#a div");

// store data
myEl.set('myStoredValue', 10);

// get data
myEl.get('myStoredValue');      // 10

CSS3 Animations

The crown jewel of DOMmy.js is its animation engine. This is based on CSS3 animations engine, so it works with all the major browsers. Animations are generated through the fx method, that accepts the following arguments:

  • an object, representing the CSS property to animate;
  • a number, representing the duration of the animation, in seconds. Default value is 5 seconds;
  • a function, representing a callback that will be called once the animation is done;
  • a boolean, representing whether to chain concurrent animations or not. Default is false.

Let’s see how to use the fx method, by creating two simple animations.

// simple animation
$('myel').fx({'width': '300px', 'height': '300px'}, 2);

Here we simply alter the CSS properties width and height of #myel in 2 seconds. In the following example we create the same animation with a duration of 1 second and with a callback function that will edit the HTML content of the element with the “Completed!” string.

You can access the current element by using the this keyword:

// simple animation with callback
$('myel').fx({'width': '300px', 'height': '300px'}, 1, function() {
        this.html('Completed!');
});

Chaining

You can create magic with “animation chaining”: by using true as a value of the fourth parameter, you can chain as many animation as you want. To do this, simple use the fx method more than once on a specific selector. In the following example we change the width of all HTML elements that match the “.myel” selector on multiple times:

var callBack = function() {
    // do something cool
};

// queue animations
$$('.myel').fx({'width': '400px'}, 2, callBack, true);
           .fx({'width': '100px'}, 4, callBack, true);
           .fx({'width': '50px'}, 6, callBack, true);
           .fx({'width': '600px'}, 8, callBack, true);

Of course you can chain everything. DOMmy.js’s structure allows you to set concurrent calls to elements:

// multiple calls
$$('div#e, #d')
    .fx({'font-size': '40px', 'color': 'yellow'}, 1)
    .fx({'font-size': '10px', 'color': 'red'}, 1)
    .attr('title', 'thediv')
    .attr('class', 'thediv')
    .attr({'lang': 'en', 'dir': 'ltr'});

Remember that the chained calls will be executed immediately. If you want to chain something at the end of a specific animation you have to set a callback for that animation.

Create an Event Handler That Fires Animations

Now, we want to set up a snippet that produces an animation on a specific element. This animation will fire when the user moves the mouse over the element itself and when he leaves back the mouse. At the end of each step, a proper HTML content will be set:

$('myElement').on({
    'mouseover': function() {
        this.fx({'width': '300px'}, 1, function() {
            this.html('Completed!');
        });
    },
    'mouseout': function() {
        this.fx({'width': '100px'}, 1, function() {
            this.html('Back again!');
        });
    } 
});

As you can see, with DOMmy.js is super-easy to work with CSS3 animations. Always remember that this refers to the current element.

Now, we want to produce a chained animation that alters the CSS style of an element in four different steps, using four different callbacks and fire this animation when the user clicks the element:

   var clicked = false;
   
   $('myElement').on({
    'click': function() {
        if( !clicked ) {
            clicked = true;
            this.fx({'width': '300px', 'height': '300px', 'background-color': 'red', 'border-width': '10px'}, 1, function() {
                this.html('1');
            }, true)
            .fx({'height': '50px', 'background-color': 'yellow', 'border-width': '4px'}, 1, function() {
                this.html('2');
            }, true)
            .fx({'width': '100px', 'background-color': 'blue', 'border-width': '10px'}, 1, function() {
                this.html('3');
            }, true)
            .fx({'height': '100px', 'background-color': '#3dac5f', 'border-width': '2px'}, 1, function() {
                this.html('4');
                clicked = false;
            }, true); 
        }
    } 
  });

You can see these snippets in action directly in the Demo section of the DOMmy.js project.

Add Realistic Chalk and Sketch Lettering Effects with Sketch’it – only $5!

Source

p img {display:inline-block; margin-right:10px;}
.alignleft {float:left;}
p.showcase {clear:both;}
body#browserfriendly p, body#podcast p, div#emailbody p{margin:0;}

from Webdesigner Depot https://ift.tt/2RkKkaf


from WordPress https://ift.tt/2Q33gh5

Tuesday, November 27, 2018

Cyber Monday Deal: Elegant Themes Offers Its Biggest Discount Ever

There’s never a shortage of good deals to be found on a Cyber Monday, and this year is no different. Still, you usually have to do your share of searching to uncover some really great deals.

This little gem easily qualifies as the #1 Cyber Monday deal for designers and developers. It’s offered by Elegant Themes, the creators of the world’s most highly regarded premium WordPress theme – Divi.

Elegant Theme’s offer? 25% off on their Developer and Lifetime accounts, including a free assortment of Divi layouts.

A Few Words About This Exceptional Elegant Themes Deal

If you’re not familiar with Elegant Themes and its wildly popular products, here are a few things you need to know about this website-building tool provider and its Cyber Monday offer.

#1. Elegant Themes is the Ultimate WordPress Toolkit for Designers and Developers

By signing up for a membership you’ll get access to 87 different themes, 3 plugins, and the ultimate WordPress theme and visual page builder – Divi.

You’ll quickly discover how your new membership will forever change for the better, your website-building undertakings.

#2. You Get Unlimited Use

Pricing per website will become a thing of the past. With your Elegant Themes membership, you’ll be able to enjoy unlimited use. Take advantage of the Cyber Monday deal, and the one-time fee you pay will be reduced by 25%!

When you consider the outstanding value you get when paying the full fee for this superb collection of WordPress tools, it’s not hard to see why the Cyber Monday deal represents an opportunity you won’t want to let slip by.

#3. Elegant Themes’ Pricing Plan is About as Simple as it Gets

No beating around the bush, no teaser offers, and most certainly no bait-and-switch offers. It’s simply a matter of paying a one-time fee (at a discount!) for your membership to gain access to Elegant Themes’ entire collection of themes and plugins.

Better yet, you can use these themes and plugins to build as many websites as you want.

#4. You’ll Receive Products You Can Trust

Elegant Themes has been in the WordPress theme and plugin business for the past 10 years. During that time, they’ve created some of the world’s most popular products on the market, products they constantly maintain, refine, and improve – every single one of them.

What Comes With the Cyber Monday Deal

You’ll find “everything” to be quite impressive, since it includes a set of useful products website designers or developers would love to get their hands on.

First, There’s Divi – The World’s #1 Premium WordPress Theme

This is Elegant Theme’s flagship theme, and according to stats supplied by BuiltWith.com it’s the world’s most widely used premium WordPress theme. To call Divi a theme (as everyone does) is in truth somewhat of an understatement.

In reality, Divi is a website builder’s framework that, with it’s outstanding assortment of tools enables its users to build stunning, high-performance websites without coding and without any need to install and configure a collection of special-purpose plugins.

Divi’s enthusiastic community of over 500,000 users attests to its popularity.

Next, There’s the Divi Builder

This drag and drop website-building stand-alone plugin works with any theme. Its authors used the same visual page-building technology they used when creating the hugely successful Divi theme.

The Divi Builder’s intuitive visual design interface enables you to build anything and everything and customize what you’ve created down to the smallest detail.

The Extra WordPress Theme

Extra is Elegant Theme’s ultimate magazine WordPress theme. It’s powered by the Divi Builder framework and extends the Builder’s capabilities with a set of 40 post-based content modules that’s perfect for creating online publications and blogs.

All that’s required of you when using this magazine theme is to choose the content elements you want to use and customize and arrange them to fit your needs.

Bloom – An Easy-to-Use Lead Generating Plugin

This Elegant Themes product makes gathering leads and building an email list a piece of cake. It offers six opt-in types, each of which can be customized to create a sophisticated targeting approach designed to engage visitors and capture leads.

This easy-to-work-with plugin does your email list-building for you. It has every tool needed to entice a visitor to become a follower and a customer.

Monarch – A Plugin Designed to Assist You with Your Social Sharing Activities

It’s social media that makes the Internet tick, and social sharing that uses this media to benefit businesses. Monarch was designed to help you engage and empower vibrant online communities, provide social sharing support, and increase the number of your followers.

Its authors took great care to ensure its use would in no way compromise the integrity of any of your website designs.

Wrapping Up

Given what you get for your money, Elegant Themes’ Cyber Monday deal not only provides value; it provides it in spades. Even its authors call their deal crazy; no doubt because 25% represents the biggest discount they’ve ever offered.

If you were to pay the full fee for Divi, the Divi Builder, Extra, Bloom, and Monarch, it would still be a deal you would not want to pass up.


[- This is a sponsored post on behalf of Elegant Themes -]

Add Realistic Chalk and Sketch Lettering Effects with Sketch’it – only $5!

Source

p img {display:inline-block; margin-right:10px;}
.alignleft {float:left;}
p.showcase {clear:both;}
body#browserfriendly p, body#podcast p, div#emailbody p{margin:0;}

from Webdesigner Depot https://ift.tt/2FLWt6B


from WordPress https://ift.tt/2QlFaND

If I Had to Start a Blog From Scratch, I Would…

neil patel

You’ve seen me and thousands of other marketers talk about how to make a blog popular. But if you don’t set up your blog correctly, you won’t do well no matter what kind of marketing you do.

And no, I am not talking about the technical setup of your blog. I am talking about the foundation. From what you are blogging about, to how you structure your content… there are a lot of basics people get wrong.

And if you get them wrong, it’s going to be that much harder to get more traffic (and more importantly monetize the traffic).

So, if I had to start a blog from scratch again, here are the principles I would follow before even writing my first blog post:

Principle #1: Pick a big enough niche

Unless you are well funded, you have to pick a niche. It’s too hard to compete on a broad level with sites like Huffington Post and Business Insider. They well funded and are able to produce huge amounts of content from contributors big and small.

And if your niche is too small, it will be hard for you to grow your traffic and monetize your blog as there just won’t be enough people interested in what you are blogging about.

When trying to find a niche, use Google Trends. Make sure to pick a niche that is bigger than “digital marketing” but smaller than “nutrition.”

Principle #2: Don’t stick with one platform

I know I’ve told you that you need to use WordPress as your blogging platform, but it shouldn’t stop there. Why not also use Medium, Tumblr, LinkedIn, and even Facebook?

These are all platforms where you can repurpose your content.

Blogging is competitive, so you’ll need to push your content out on as many platforms to ensure that you’ll get the most eyeballs.

Setting up social accounts across the different platforms is really important. Make sure the branding and imagery are the same across all of them and try to generate some followers by following these steps so that when you start producing unique content you’ll have places to promote.

Principle #3: Control your destiny

Google doesn’t penalize for duplicate content. But that doesn’t mean you should just post your content on every platform without thinking of it.

The only platform that doesn’t have an algorithm that you need to worry about is your own blog. Facebook, Medium, Tumblr, and LinkedIn all have algorithms you can’t fully control.

Always link back out to your site when posting on these other platforms. The more people you can get back to your site, the better chance you will have of growing your traffic and monetizing.

Other platforms like Facebook don’t make it easy for you to generate revenue if you keep your readers on their platform.

Principle #4: Blogging is both about “you” and “I”

Blogging is something that is supposed to be informal. No one wants to read an essay or a white paper.

People want to read stories. They want to be involved in a conversation, and the easiest way to do this is to use the words “you” and “I” within your blog posts.

This one simple change will help you build a deeper connection with your readers. A deeper connection means better monetization in the future.

Principle #5: Always ask questions

At the end of every blog post, always ask a question. If you don’t ask a question, people won’t know what to do next.

By asking a question, a portion of your readers will answer it by leaving a comment. This will increase engagement, which again will make monetization easier in the long run.

Principle #6: You have to stand out

There are over a billion blogs on the web, and that number is continually rising. This just means blogging is going to get even more competitive over time.

So how do you stand out in a crowded marketplace?

You have to go above and beyond. Sadly, there is no single answer as every industry is different, but typically infographics, visuals, and doing the opposite of everyone else in your space will help you stand out.

For example, if everyone in your space writes 1000-word blog posts, test out writing 10,000-word posts. Or if everyone is using text-based content, test out visual based content like infographics or video.

Principle #7: Your content needs to be portable

People are always on the go these days. Your content needs to be easy to digest.

And no, I am not talking about making your content mobile compatible or leveraging AMP framework (although those are good ideas). I am talking about making your content portable.

For example, creating video-based content or audio-based content (podcasts) are simple ways to make your content portable. For example, it is easier to watch video-based content on your mobile phone when on the bus or listen to podcasts while you are driving.

Principle #8: Content isn’t king unless it’s good

You’ve heard the saying that content is king. But is it really?

The Washington Post publishes over 500 pieces of content per day. The Wall Street Journal is at 240, the New York Times is at 230, and Buzzfeed is around 222.

The list keeps going on and on as there are over 2 million blog posts published daily.

In other words, writing mediocre content isn’t good enough. It won’t do well for and you will just be wasting time. So, don’t write content unless it is really, really, really good.

Principle #9: You have to produce quality and quantity

It’s sad, but it is true. Not only does your content have to be amazing, but you have to publish amazing content in quantity.

Just because you are writing an amazing blog post, it doesn’t mean you will do well. Content marketing is a hit or miss game in which your posts will do well or they won’t. And in most cases, your content won’t do as well as you want no matter how good you are at marketing.

To increase your odds of success, you need to be willing to produce amazing content in quantity.

Principle #10: Your blog isn’t always the best place to blog

Especially early on, you need to save your best content for other blogs. From industry blogs to large sites like Entrepreneur and Business Insider… consider placing your best content elsewhere.

Once you’ve been blogging for a year and you have built up an audience, you’ll want to keep your best content for yourself. But in the beginning, placing your best content on more popular blogs will help you increase your brand recognition and audience.

If you aren’t sure on how to craft a guest posting proposal, read this.

Principle #11: Useful content beats viral content

We all dream about viral content, but it’s not easy to produce.

The chances of your content going viral are slim to none. And when your content goes viral it will die down… the question just becomes when.

Instead of focusing on creating viral content (when you have less than a 1% chance of producing it), focus on creating useful content. Useful content tends to be evergreen, which means it can generate steady traffic over time.

Principle #12: It’s easier to build a personal blog than a corporate one

I know I’ve mentioned that I wouldn’t build a personal brand if I started all over again, and I wouldn’t.

But that doesn’t mean that you shouldn’t leverage one. People connect with people more than they connect with corporate brands.

It’s not like you have conversations with Coca-Cola or Nike like you have with a friend.

If you want your blog to be popular faster than go with a personal brand. If you want to build something big and potentially even sell it one day, consider a corporate brand for your blog (even though it will take longer for it become popular).

Principle #13: A blog won’t work without a community

Blogging is about creating conversations. But without readers and community, there is no conversation.

It would just be you talking…

For this reason, you can’t expect to build a popular blog without building up your social profiles.

From running Facebook and Twitter ads, to manually growing your follower counts, you need to focus on your social media game.

The bigger your social following the more people you’ll have to drive to your blog, and the easier it will be to create a community.

Principle #14: No man is an island

As you are building up a community, people will engage with you through comments.

If you don’t respond to every comment, then your community will slowly die down.

Just think of it this way… if you continually talked to someone and they ignored you each and every time, what would you do? Eventually, you would stop talking to them.

Don’t be rude to your community, help them out. Make sure you respond to each and every comment. Not just on your blog, but even when people comment on your social profiles, make sure you respond back.

Principle #15: People don’t read, they skim

Most of the people that come to your website won’t read. Blogs tend to have an average time on site of less than 1 minute.

There is no way your average visitor is going to read your 2,000-word blog post in under a minute. That means people skim.

Make sure you write your content with the assumption people skim. From leveraging headings to even writing a conclusion at the end of each post, this will help your readers get value out of your content even when they don’t fully read it.

Principle #16: It’s all about the headline

Some people spend 80% of their time writing the content and only 20% promoting it. Others spend 80% on marketing and 20% on the content creation. And some spend 50% of their time writing and 50% promoting.

But what about the headline? Why don’t people spend time crafting and testing amazing headlines?

What most people don’t know is that 8 out of 10 people will read your headline, but only 2 out of 10 will click through and read the rest. So focus on creating amazing headlines or else you won’t get tons of traffic.

Principle #17: Reveal your cards, all of them

Because the blogosphere is competitive, you have no choice but to reveal your cards. From your secrets to the “good stuff”… you’ll have to share it all.

If you don’t share it, you won’t be giving people a reason to read your blog over the billion other ones out there.

When revealing your cards, make sure you do it early on in each blog post. It is a great way to hook your readers and to get them to read the rest of your content.

Principle #18: Consistency will make or break you

When you continually blog, do you know what happens? Your traffic typically stays flat or slowly goes up.

But when you stop or take a break, your traffic will tank. And then when you start up again, your traffic won’t just go back to where it was, you’ll have to fight to gain your traffic back.

I once took a month break from blogging and it took me 3 months to recover my traffic. Literally 3 months.

Don’t start a blog unless you are willing to be consistent. Not just for a few months or a year, but I am talking years (3 plus).

Principle #19: Don’t ever rely on 1 traffic channel

You hear blogs exploding with Facebook traffic or Google traffic. But do you know what happens when those sites change their algorithms?

Your traffic drops.

It’s just a question of when, so expect your traffic to drop. So, don’t rely on only one traffic channel.

Before you write your first post, think about which channels you are going to leverage for traffic generation. You need to have an omnichannel approach in which you are leveraging all of the feasible channels out there that work for your niche.

Principle #20: Don’t forget about Google

You should always write for humans and not search engines. But that doesn’t mean you should ignore Google.

Whatever you are considering writing about, make sure you do some basic keyword research. Head over to Ubersuggest first. Then type in a few keywords related to your article and it will show you a list of other popular phrases.

If they are relevant, make sure you blend them into your content.

This one simple thing will help ensure that your content gets the most search traffic that it can possibly generate.

Principle #21: Be willing to kill your baby

When you start a blog, people only talk about writing and marketing. But as your blog gets older your responsibilities will grow.

One of them is the willingness to kill some of your content.

Not all of your content will be relevant a year or two from now. For example, if you write about Vine, which was a company Twitter bought and then shut down, it won’t be relevant anymore. Especially if the article focuses on “Vine marketing tips.”

Eventually, you want to delete it. There is no point in keeping useless content on your blog.

Principle #22: You can’t set it and forget it

Similar to killing some of your irrelevant content, you’ll also have to update your older content.

As your content gets outdated, you’ll want to keep it fresh or people will find that it’s useless and bounce away.

This, in turn, will screw up your user metrics (bounce rate, time on site, page views per visitor) and reduce your credibility and traffic.

If you are going to blog, be willing to put resources into updating your older content as well. It’s something that most bloggers don’t take into account when starting.

Principle #23: People won’t come back to your blog unless you ask them to

The best visitors are repeat visitors. They are more likely to comment, link to your site, share your content on the social web, and convert into a customer.

No matter how good your content is, people won’t just come back unless you ask them to.

The easiest way to do this is through emails and push notifications.

By using tools like Hello Bar you can easily collect emails and send out a blast every time you have a new post. And tools like Subscribers will allow you to build a push notification list.

Don’t start a blog without building an email list or push notification list. You’ll find that people who opt-in to them are much more likely to convert into customers. So, build this from day 1.

Principle #24: Don’t wait too long to monetize

A lot of bloggers (including me) have made this mistake. We all wait till we have tons of traffic to monetize. But if you go years before trying to monetize, people will assume everything on your blog is free.

In other words, you are training your readers that they shouldn’t pay for anything. And that’s fine if you have no plan on selling anything.

But you should train them early on that not everything is free. This will make your revenue numbers better as you grow.

Principle #25: Have multiple monetization strategies

You can’t rely on one monetization strategy such as affiliate marketing or AdSense. Sometimes things happen that aren’t in your control such as an offer gets shut down or AdSense bans you and they don’t give you a reason.

Not only is it a safer strategy to have multiple monetization methods you’ll also make more money.

For example, some people won’t click on ads, while others may prefer buying an e-book from you.

When you start your blog, think about all of the monetization methods you want to try out and plan out how you are going to test them out (as not all of them will work).

Principle #26: Always include a personal touch

If you can’t write with a personal touch, then don’t write. Whatever you decide to blog about, make sure you can tie in a personal story.

People prefer reading content that has stories versus content with just facts and data.

If you don’t have personal stories that you can tie in, that means you are probably blogging on the wrong subject.

Principle #27: Be willing to pay the price

Blogging isn’t easy. It’s no longer a hobby where you can just write whenever you want and do well.

If you want to succeed, you have to be willing to put in the time and energy. And if you can’t, then you have to be willing to put in money.

If you don’t then you won’t do well, no matter how brilliant of a writer or marketer you are.

Really think about if you are willing to put in hours each day into making your blog successful. And are you willing to do that for a few years? Or are you willing to hire someone from day 1 to help out?

This isn’t a principle you need to take lightly, and it is the biggest reason most bloggers don’t make it.

Conclusion

Everyone talks about blogging from a tactical standpoint. From how you write content to even how to market it, but very few people talk about strategy.

If you don’t follow the above principles, you’ll find yourself spinning your wheels and creating a blog that doesn’t get any traction.

And if you happen to be lucky to gain visitors without taking into account the above principles, you’ll find that they won’t convert into customers.

So what other principles should bloggers follow? Just leave a comment below with some of the principles you follow.

The post If I Had to Start a Blog From Scratch, I Would… appeared first on Neil Patel.

from Blog – Neil Patel https://ift.tt/2r6Esph


from WordPress https://ift.tt/2DY5urr

Monday, November 26, 2018

3 Essential Design Trends, December 2018

It can be hard to think about, and take on new design projects at this time of year. Maybe a little design inspiration is just the thing to pep you up and get you thinking about wrapping up those projects.

There’s a continued shift toward designs with more complex visual effects and these trends are no different with stacked text elements, glitchy video effects and artistic imagery.

Here’s what’s trending for the end of 2018:

1. Stacked Text

The days of the oversized, three-word homepage headline are numbered.

Designs are moving toward blocks of stacked text on the homepage. Visually, the weight of an oversized headline is still there. Informationally, there’s a lot more room for messaging. (Just don’t pack these headlines with unnecessary words.)

The key to making this design trend work is typeface selection. You need a font that’s easy to read and gives you plenty of room between lines (but not too much room). Typefaces with exceptionally long ascenders or descenders can be an issue here.

While designers are experimenting with all kinds of different typefaces, number of lines of stacked text, and alignments, there are plenty of all caps variations (that gets rid of the descender problem) and sans serifs. But don’t feel like this is a rule. Upper- and lowercase letters can look great in stacked blocks, as can serif typefaces.

When picking a typeface for this treatment, look for the following:

  • Standard or medium x-height without long or elaborate swatches or flourishes. These characters can cause readability concerns in blocks of text.
  • Regular shapes that aren’t too condensed or flattened. You know you are close when the bowls of each “o” is fairly round.
  • Lettering with a style that seems to take on the mood of its surroundings. A font with too much personality here could overpower the actual words.

Home

https://hairpin.org/embed/#?secret=kqZmF2eZHF

2. Glitchy Video

Wait…that video is glitchy…on purpose?

While it used to be that glitchy video was a result of a slow internet connection or page load speed, glitchy video is a trend. Maybe we can attribute it to things like TikTok, a growing social media platform that uses this technique. Maybe we can attribute it to the fact that it stops users and makes them look. (Even if they might ask if that’s supposed to happen or not.)

Either way, glitchy video effects are a definite web design trend.

They might happen in the form of background video with distortions or glitch effects, animations that are activated by a hover or click with the same jerky movements or can seem totally random in a full-screen video.

The evolution of glitch effects might also trace to the rise of brutalism. This “harsh” design technique has a similar feel as many of the brutalist designs that we’ve seen.

When planning to use video in a way that’s glitchy or distorted, it’s important to use the trend in a way that has some purpose or intent. If the video just looks poorly created or bad, users will be turned off rather than intrigued by the design.

It also takes a certain type of content for this effect to really have an impact. It is a gritty visual. It won’t mesh with soft content.

The effect is often paired with more minimalist design frameworks and often doesn’t include a while lot of color. (Probably because the “trick” in the design is the glitch effect. With too many other things going on, it could turn into a design disaster quickly.)

If you want to try a glitch effect, opt for a simple design pattern and use it in a way that matches content. (My favorite of the examples below is Studio Digital Creatif, which has a very old-school feel where the glitchy video seems like a television screen from decades past.)

3. Almost Abstract Art

Exercise your creative muscles with more artistic representations on website homepages. While these designs might seem best suited for art galleries, abstract art is finding its way into a number of projects. (And it’s a trend we can get onboard with.)

What’s nice about this trend–and concept–is that it can be accomplished in so many different ways. Each of the examples below takes a different approach to using almost abstract art in the design.

  • Montreal in Motion uses moving colored blobs to pull you into the design. It looks a little like water moving or maybe colors in the evening sky. Either way the artistic quality of the background draws users in.
  • Barkli Gallery uses an actual piece of art to draw users into the design. This is an appropriate use for a gallery, but what’s nice is that the art isn’t showed full-screen in its entirety. You only see a portion of the image, giving it an even more abstract feel.
  • Wildsmith Skin uses a split screen design with a person on the left and an abstract image for balance on the right. You might think the abstract image is a cellular-level view of skin or maybe a look at the product under a magnifying glass. Either way it creates a nice harmony with the main image and generates a lot of visual interest.

Conclusion

When in comes to design trends, do you like to be ahead of the curve or a little behind it? The examples above are pushing some of the boundaries of what has been popular visually for a while, with fresh takes on everyday ideas.

What trends are you loving (or hating) right now? I’d love to see some of the websites that you are fascinated with. Drop me a link on Twitter; I’d love to hear from you.

Add Realistic Chalk and Sketch Lettering Effects with Sketch’it – only $5!

Source

p img {display:inline-block; margin-right:10px;}
.alignleft {float:left;}
p.showcase {clear:both;}
body#browserfriendly p, body#podcast p, div#emailbody p{margin:0;}

from Webdesigner Depot https://ift.tt/2Qi4zbi


from WordPress https://ift.tt/2Sd2OJD

Sunday, November 25, 2018

Popular Design News of the Week: November 19, 2018 – November 25, 2018

Every week users submit a lot of interesting stuff on our sister site Webdesigner News, highlighting great content from around the web that can be of interest to web designers. 

The best way to keep track of all the great stories and news being posted is simply to check out the Webdesigner News site, however, in case you missed some here’s a quick and useful compilation of the most popular designer news that we curated from the past week.

Note that this is only a very small selection of the links that were posted, so don’t miss out and subscribe to our newsletter and follow the site daily for all the news.

10 Small Design Mistakes We Still Make


The State of JavaScript 2018


25 CSS Color Palettes Template Width Codes


Mute all Background Noise During your Calls


“The World’s Gone Flat!” -  Evolutions in Interface Design


Sketch Vs. Sketch


23 Clever Typographic Logos


10 Skills that Make a Great Designer


Use Adobe Draw to Get your Illustrations, Art and Drawn Designs into 3D


Why are Micro-Experiences so Important to UX Design?


Site Design: Humen


21 of the Most Beautiful Objects and Designs in the World


How to Create Compelling Content for your Portfolio Site


New Storybook.js in the Browser


A Small French Privacy Ruling Could Remake Adtech


Armchair VGUX: No Man’s Sky


This is the Most Complex Generative Design Ever Made


9 Steps in the Lifecycle of a Design Trend


Less is More – Using Lean UX to Assess Product Viability


This is (almost) Everything I Learned in Design School


Editorial Layouts, Floats, and CSS Grid


How to Build a WordPress Theme from Scratch


The Most Complete Design Thinking Tools & Resource Collections


The Mystery Font that Took Over New York


The 6 Rules to own Design


Want more? No problem! Keep track of top design news from around the web with Webdesigner News.

Add Realistic Chalk and Sketch Lettering Effects with Sketch’it – only $5!

Source

p img {display:inline-block; margin-right:10px;}
.alignleft {float:left;}
p.showcase {clear:both;}
body#browserfriendly p, body#podcast p, div#emailbody p{margin:0;}

from Webdesigner Depot https://ift.tt/2P1F0qi


from WordPress https://ift.tt/2AqhCx8